Monday, December 8, 2014

Glamorous Gougeres

Gougeres (goo-zhairs) are a classic French appetizer made with "pate a choux" dough (see Mon Petit Chou) and flavored with cheese, traditionally Gruyere, Comte, or Parmesan. Gougeres originated from the Burgundy region in France where they are frequently served at wine tastings. How posh! Although they may appear to be some feat of magic, they are quite simple to make. In addition, they can even be made ahead, refrigerated or frozen to be reheated just before serving. Perfect for the holidays! 

Feel free to play with the seasonings, e.g., Gruyere and a pinch of cayenne or finely chopped thyme, Roquefort and finely chopped toasted walnuts, Manchego and freshly ground black pepper, and following my Texan sensibilities, sharp cheddar and finely chopped green chiles! (I hear French people crying, "Oh la vache!") If you choose the traditional version, you can serve them alongside soup for an elegant accompaniment, cut them in half and fill them with salmon or foie gras mousse, or even make them larger and fill them with Waldorf salad, or serve them with steak as a holder for your steak sauce like bordelaise, hollandaise, or bernaise. The possibilities are truly endless! You must add these babies to your culinary repertoire! You can thank me later!


Gougeres

Makes approximately 50 bite-size gougeres or 8 large ones.

Ingredients:
1 cup milk
1/2 cup (1 stick) butter
1/2 teaspoon salt
1/2 teaspoon sugar
1 cup flour
4 large eggs
pinch of cayenne
1/2 cup (4 ounces) grated Gruyere cheese

Directions:

In a medium saucepan, bring the milk, butter, sugar, cayenne, and salt to a boil over medium heat. Bring to a simmer and stir in the flour, about 1/4 cup at a time, stirring vigorously with a wooden spoon.


The mixture will become a big ball. Remove from the heat and allow to cool to room temperature.


Preheat your oven to 375 degrees.

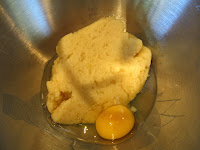
Transfer the blob to the bowl of a stand mixer, or large mixing bowl. Starting with the lowest setting, beat in the eggs, one at a time.


Don't add the next egg until the previous one has been incorporated. Beat until smooth and velvety. Stir in the Gruyere.

Line a cookie sheet with parchment paper or a Silpat mat.

Using a pastry bag or two spoons, pipe or drop approximately 1" balls onto the sheet.


Using your finger dipped into a little milk, pat down the tips from piping, if necessary.


Bake for 25-30 minutes (or approximately 45 minutes for 8 large ones), or until puffed, medium-golden brown, and dry on the outside. (You need to keep and eye on them, and can check to make sure they are fully cooked by cutting one open.) When done, remove to a cooling rack and serve warm. (Some people recommend piercing each one with a skewer or toothpick to allow steam to escape.) 


*If making ahead, allow them to cool completely. Once cooled, they can be stored in an airtight container, refrigerated, or even frozen. To reheat gougeres, bake them in a preheated 350 degree oven for 10 minutes or 15 minutes if unthawed frozen.

Friday, November 7, 2014

EAT MOR CHIKIN!

The Chick-fil-A Chicken Sandwich was invented by S. Truett Cathy at his first restaurant in Atlanta called The Dwarf Grill in 1946. The chicken sandwich, which was based on his mother's recipe, became so popular that in 1967 Cathy opened the first Chick-fil-A restaurant in Atlanta. The company now operates thousands of restaurants in 41 states, raking in more than $5 billion in annual sales. Chick-fil-A is known for their strong Christian values, remaining closed on Sundays as well as controversial views on gay marriage, which sparked protests across the country. S. Truett Cathy passed away in September, but rest assured his son, Dan Cathy, has the chicken empire well under control. 

Whether you love Chick-fil-A or hate them, they do know how to make a damn good chicken sandwich! The not-so-secret secret to Chick-fil-A's success is pickle juice! Yes, that's right, pickle juice. Besides making a terrific marinade to ensure tender, juicy chicken, pickle juice has many uses you may not know. Pickle juice is used by many athletes to relieve muscle cramps and restore electrolytes. There is even a sports drink called Pickle Juice Sport. In addition, pickle juice is touted as a hangover cure, a cure for menstrual cramps and heartburn, and may even stop hiccups! So stop throwing out your pickle juice and start adding it to your dressings, BBQ sauce, or anywhere you would add vinegar. Don't believe me? Why not try this fantastic copycat recipe that's floating around all over the internet for the Chick-fil-A Chicken Sandwich! Cows everywhere will thank you!


Chick-fil-A Chicken Sandwich

Serves 2-4 (The coating is ample for 2 and just enough for 4 chicken cutlets.)

*Waffle fries make the perfect accompaniment!

Ingredients:
1-2 chicken breasts, pounded to 1/2-inch thickness and then cut in half, or 2-4 chicken cutlets (Chicken cutlets are sold at most grocers.)
1/4 cup dill pickle juice
1 egg
1/4 cup milk
1/2 cup flour
1 tablespoon powdered sugar
1/2 teaspoon paprika
1/2 teaspoon salt
1/4 teaspoon black pepper
1/4 teaspoon garlic powder
1/4 teaspoon celery salt
1/4 teaspoon dried basil
1/2 teaspoon cayenne
Oil for frying
2-4 buns, buttered and toasted
Pickle slices (2 per sandwich)
Optional: Mayonnaise, cheese slices, lettuce, and tomato

Directions:
Marinate the chicken in the pickle juice in a quart-size freezer bag for 30 minutes to 1 hour.


Beat the egg with the milk in a bowl. Combine the flour, sugar, paprika, salt, black pepper, garlic powder, celery salt, dried basil, and cayenne in another bowl.


Dip the chicken cutlets in the egg mixture and then coat in the flour on both sides.


Heat the oil in a skillet (1/2-inch deep) to about 345-350. (I don't bother with a thermometer, instead if you drop a small piece of bread in the oil and it immediately starts to bubble, it's ready.) Fry each cutlet for 2 minutes on each side, or until golden and cooked through.


Drain the chicken on a rack over paper towels.


To serve authentically, place 2 pickle slices on the bottom bun, top with the chicken, and then the top bun. Enjoy!

Thursday, October 23, 2014

Witch Finders Direct


*Apparently BBC has blocked this video. What a shame.*

If you enjoyed that, you'll definitely enjoy these Chocolate-Hazelnut Smooches, or as my kids like to call them, "Witch Hat Cookies"!


Witch Hat Cookies

Makes about 3 dozen.

Ingredients:

1 3/4 cup all-purpose flour
1 teaspoon baking soda
1/2 teaspoon salt
1/2 cup chocolate hazelnut spread (Nutella)
1/2 cup butter, softened
1/2 cup sugar
1/2 cup light brown sugar
1 egg
1 teaspoon vanilla extract
1/2 cup orange sprinkles, or orange sugar
1 (9-ounce) package of chocolate candy kisses, unwrapped (Hershey's)

Directions:

Preheat oven to 375 degrees.

In a medium bowl, combine flour, baking soda, and salt. Set aside.

In another medium bowl (or stand mixer), place the chocolate hazelnut spread, butter, and both sugars. Using a hand mixer (or stand mixer), cream the ingredients together, about 3 minutes. Add the egg and vanilla extract and blend until incorporated. Stir in the dry ingredients, just until incorporated.

Shape the cookie dough into walnut-sized balls. Roll the balls in the orange sprinkles or orange sugar, pressing to adhere. Place the cookies on a heavy cookie sheet about 4 inches apart. (I put 8 cookies per sheet.) Bake for 6-8 minutes. (6 for softer cookies and 8 for crispier cookies.) Meanwhile, unwrap as many kisses as you need. Remove the cookies from the oven. Quickly place a chocolate kiss in the middle of each cookie and slightly press down, the puffed edges will crack. Return the cookies to the oven and bake for another 2 minutes. Cool the cookies on a wire rack. Yum!

Recipe adapted from Giada De Laurentiis.

Video from CBBC Channel!

Friday, September 26, 2014

Bon Appetit, Ya'll!

I love checking out cookbooks from my local library. It keeps my bookshelves from overflowing and allows me to try some of the recipes before I may decide to purchase the book. When I saw Bon Appetit, Ya'll: Recipes and Stories from Three Generations of Southern Cooking by Virginia Willis, I just had to check it out! I tried many recipes in the book, including the one for Jambalaya (which does have an error in it), but the recipe I keep going back to is a simple one for "Toasted-Pecan Green Beans." 

When we think of southern style green beans, we assume it's the meltingly tender ones that are slow cooked, usually with some type of pork product and onion. Although I love them, my green bean-phobic husband does not...but he loves these! This simple recipe is like a southern version of green beans amandine, where the green beans are blanched first, then sauteed with buttery toasted pecans, minced garlic, and a dash of fresh basil. The result is perfectly cooked green beans that taste absolutely amazing! In addition, this technique (which works well with other types of vegetables, see Spring Vegetable Tumble) allows you to blanch the beans ahead of time, freeing your focus to the main course, and gives you a beautiful side dish that takes only minutes to put together! Thanks Virginia, for giving me my green beans back!


Toasted-Pecan Green Beans

Serves 4-6

Ingredients:
1 1/2 pounds haricots verts, trimmed (Sadly, I am finding it harder to locate haricots verts in my area, so I used regular green beans and blanched them for 5 minutes.)
1/4 cup olive oil
1/2 cup chopped pecans
1 garlic clove, very finely minced
1 tablespoon chopped fresh basil
Coarse salt and freshly ground black pepper

Directions:
Prepare an ice-water bath by filling a large bowl with ice and water.

Bring a large pot of salted water to a rapid boil over high heat. Add the beans and cook until crisp-tender, about 3 minutes. (5 minutes for regular green beans.) Drain well in a colander, then set the colander with beans in the ice-water bath (to set the color and stop the cooking), making sure the beans are submerged. (I just dump the beans in the ice-water bath, then drain them before finishing the dish.)

In the same pot (I use a large saute pan), heat the olive oil over medium-low heat. Add the pecans and cook until toasted, about 5 minutes. Add the garlic and basil; cook until fragrant, 45 to 60 seconds.


Drain the beans, shaking off the excess water, and return them to the pot. Toss to combine with the pecan mixture. (Keep tossing until the beans are reheated.) Taste and adjust for seasoning with salt and pepper. Serve immediately.

Friday, September 19, 2014

Beef. It's What's For Dinner.

The National Cattlemen's Beef Association is a trade association designed to support and promote U.S. cattle and beef producers. In 1992, under contract by the Beef Checkoff, they launched their advertising campaign through television, radio, and print ads touting "Beef. It's What's For Dinner." The ads have featured actors Robert Mitchum, Sam Elliott, and in 2008, Mathew McConaughey. McConaughey reminds me of that eccentric relative everyone has, who can't help but make you smile!

Nicked this funny picture from popwatch.ew.com! Ha! Ha!

However, McConaughey's beefy Texas drawl has been silenced (gasp!), to be replaced by Garrett Hedlund, in hopes of appealing to a younger audience. Hedlund is best known for his roles in "stellar" movies (cough, cough) such as Troy, Tron Legacy, and the debacle Country Strong. Why? I don't remember Mitchum or Elliott being any spring chickens? So, while we will miss our favorite bongo boy buddy promoting lean cuts of beef as part of a heart-healthy diet, I do have an excellent recipe for "Maple-Balsamic Marinated Steak with Grilled Pear Salad" from you know who, The National Cattlemen's Beef Association.

This simple recipe is one of my new favorites! Strip steaks, pears, and red onion are marinated in a flavorful mix of maple syrup, balsamic vinaigrette, thyme, and black pepper. The vinaigrette helps give a lot of smokey flavor by causing flare-ups on the grill. (Remember to keep it covered so they won't burn!) The steaks are then sliced and served along side the smokey pear and red onion salad, complete with leafy greens, toasted pecans, and creamy goat cheese! Fantastic! I'm sure McConaughey would approve, and yes, please come to dinner!

Maple-Balsamic Marinated Steak with Grilled Pear Salad

Serves 4

Ingredients:
2 boneless beef top loin (strip) steaks, cut 1-inch thick (about 8-10 ounces each)
2 Bartlett or red Anjou pears, halved and cored
1 medium red onion, cut into wedges large enough that they can be skewered for grilling
8 cups mixed salad greens or arugula
1/4 cup toasted and chopped pecans*
1/4 cup crumbled goat cheese*
Kosher salt, to taste

*Walnuts and blue cheese would be another option, if preferred.

For the Marinade
1 cup reduced fat or regular balsamic vinaigrette
1/4 cup maple syrup
2 teaspoons coarse grind black pepper
2 teaspoons dried thyme leaves

Directions:
Combine the marinade ingredients in a small bowl. Reserve 1/2 cup marinade for dressing the salad. Place beef steaks and 1/3 cup marinade in food-safe plastic bag; turn steaks to coat. Close bag securely and marinate in the refrigerator 15 minutes to 2 hours. Reserve remaining marinade for brushing the pears and onion.


Soak two 10-inch bamboo skewers in water 10 minutes; drain. (I just used some metal skewers.) Thread the onion wedges onto the skewers. Brush onions and cut sides of pears with half the reserved marinade.

Remove the steaks from the marinade; discard marinade. Place steaks on grid over medium, ash-covered coals; arrange onions and pears around the steaks. Grill steaks, covered, 11-14 minutes (over medium heat on preheated gas grill, 11-15 minutes) for medium rare (145 degrees) to medium doneness (160 degrees), turning occasionally. Grill onions 12-15 minutes (13-16 minutes for gas) and pears 8-10 minutes (gas grill times remain the same) or until tender, turning occasionally and brushing steak, onions, and pears with remaining reserved marinade.


Remove onions from skewers., Chop onions and pears into bite-size pieces. Combine greens, pears, onions, cheese, nuts, and reserved 1/2 cup marinade; toss gently to combine. Carve steaks into slices; season with salt, as desired. Serve with salad mixture.

Friday, September 5, 2014

How French Manufacturers, a Crazy Preacher, and Hershey's will Leave You Asking for Some More

Nothing is more quintessential summer than making s'mores over an open campfire! However, without "modern" inventions, it would have never been possible. Egyptians were the first to utilize the root of the marshmallow plant (Althaea officinalis) for medicinal purposes, specifically sore throats. By extracting the sap from the root, it was then boiled in sugar syrup and dried to create a honey-sweetened confection. In the late 19th century, French manufacturers began using egg whites or gelatin mixed with corn starch to create what we now know as the modern marshmallow, no sap required.

In 1829, Graham crackers (in bread form) were invented by Presbyterian minister Sylvester Graham, as part of his "Graham Diet." Reverend Graham believed that by adhering to a bland vegetarian diet, it would prevent people from having impure thoughts and thus prevent the act of pleasuring one's self. After all, he believed it caused blindness and insanity! Weirdo! On another note, Graham diet followers Dr. John Kellogg and brother Will Kellogg invented Kellogg's Cornflakes to adhere to Graham's doctrines. Who knew!

In 1896, Milton Hershey built a milk-processing plant in Derry Church, Pennsylvania, later renamed Hershey, Pennsylvania. After three years of experimentation, he developed the "Hershey process" used to create milk chocolate candies. In 1900, the first Hershey Milk Chocolate Bar was sold and the rest is history.

It's no wonder that these three ingredients, which are easy to pack and transport camping, had children asking for some more! In 1927, the first recipe for "Some More" was published in the Girl Scout publication Tramping and Trailing with the Girl Scouts. According to Merriam-Webster, the first use of the contraction "s'more" was in 1974, which eventually became "s'mores." But what if you don't have access to a campfire? Why not make these adorable "S'Mores Cupcakes," from the July 2014 issue of Real Simple. I found the recipe to be accurate, with the exception of the marshmallow topping. The recipe states to bake the marshmallows "until golden and deflated, 6 to 10 minutes." I waited 6 minutes, but they were not golden or deflated, just puffed up like eggs! I waited 10 minutes, the same thing. After about 12 minutes they appeared to be golden, so I pulled them out and let them cool. Big mistake! They were dry and chewy, not creamy like you would want. So, I baked a second batch for 6 minutes, allowed them to cool, and finished them off with my blowtorch. (Doesn't everyone have a blowtorch in the kitchen?) The result was the perfect gooey marshmallow with a hint of an open fire!


S'Mores Cupcakes

Makes 12

Ingredients:
For the Cupcakes
1 cup graham cracker crumbs (from 9 crackers)
1 cup all-purpose flour
1 1/2 teaspoons baking powder
1/2 teaspoon fine salt
1/2 cup (1 stick) unsalted butter, at room temperature
3/4 cup sugar
2 large eggs
1 teaspoon pure vanilla extract
3/4 cup whole milk

For the Topping
12 large marshmallows

For the Ganache
1/3 cup heavy cream
6 ounces bittersweet chocolate, chopped (I used chips.)

Directions:
For the Cupcakes
Heat oven to 350 degrees with the racks in the middle and top positions. Line a standard 12-cup muffin tin with paper liners. Whisk together the graham cracker crumbs, flour, baking powder, and salt in a medium bowl.

Beat the butter and sugar in a separate bowl with an electric mixer on medium-high until light and fluffy, 2-3 minutes. Beat in the eggs, one at a time, then the vanilla, scraping down the sides of the bowl as necessary. Reduce mixer speed to low and add the dry ingredients and milk alternately, beginning and ending the dry ingredients and mixing well between additions. Mix until just combined.

Divide the batter among the muffin cups. Bake, on the middle rack, rotating once, until a toothpick inserted in the center of a cupcake comes out clean, 20-24 minutes. (Mine were done in 20 minutes.) Cool in the tin for 10 minutes; transfer to a wire rack to cool completely.


Make the Topping
Place the marshmallows on a parchment-lined baking sheet, 2 1/2 inches apart. Bake on the top rack until golden and deflated, 6-10 minutes. Let cool. (I baked them for 6 minutes, allowed them to cool, and gave them a little blast from my blowtorch.) 


Make the Ganache
Bring the cream to a boil in a small pot. Remove from heat, add the chocolate, and let sit for 5 minutes. Whisk to combine. Let cool slightly.

Assemble the Cupcakes
Divide the ganache among the cupcakes. (It looks like there is way too much ganache, just keep spooning it on top carefully. You want to use it all or it won't be chocolaty enough.) Top each cupcake with a marshmallow. Let sit until the ganache is almost firm to the touch, 15-20 minutes, before serving. (These cupcakes are messy, so I did pop them in the refrigerator for a few minutes to aid in eating.)

Mmmmmmmmm!

Thursday, August 21, 2014

Dear Rosemary

Rosemary, the perennial herb that is native to the Mediterranean and member of the mint family, has been used since 500 B.C. for culinary and medicinal purposes. The name "rosemary" comes from the Latin words for "dew" (ros) and "sea" (marinus) meaning "dew of the sea." Rosemary has long been associated with aiding memory. Early Greek students would wear rosemary wreaths on their heads during exams. At funerals, sprigs of rosemary were placed as a token of remembrance. In the Middle Ages, rosemary was worn or carried at weddings as a symbol of happiness, loyalty, and love. It was also believed that if you slept with a sprig under your pillow, it would prevent nightmares. And the best one, if planted outside it would repel witches! 

Rosemary is one of the most aromatic and pungent herbs around. A little goes a long way. Rosemary is especially nice with roasted and grilled meats, particularly pork. This recipe for "Brined Pork Chops with Balsamic Glaze and Grilled Potato Fries" illustrates how a little rosemary can turn a simple meal into something magnificent! This recipe, which I nicked from weber.com, calls for brining the chops. As I've stated before, I'm not convinced that brining makes that much of a difference. However, give it a try and let me know what you think. In addition, don't skip the fries or sauce! They are absolutely delicious! In fact, even if you don't try the chops, you have to make the fries! So pop on some Foo Fighters and get grilling!

Not the best picture, but trust me it's delicious!

Brined Pork Chops with Balsamic Glaze and Grilled Potato Fries

Serves 4

Ingredients:
For the Brine
2 cups water
3 tablespoons Kosher salt
1 tablespoon granulated sugar

For the Pork Chops
4 pork loin chops, each 8-10 ounces and 1 1/4-1 1/2 inches thick
2 teaspoons minced fresh rosemary leaves (hopefully growing in your herb garden!)
1 teaspoon freshly ground black pepper

For the Glaze
1/2 cup good-quality balsamic vinegar
2 1/2 tablespoons unsalted butter
1/8 teaspoon Kosher salt
1/8 teaspoon freshly ground black pepper
1/8 teaspoon granulated sugar

For the Sauce
1/2 cup mayonnaise (preferably Hellmann's)
2 tablespoons chopped fresh Italian parsley leaves
1 tablespoon chopped fresh chives
2 teaspoons Dijon mustard
1 large garlic clove, minced (See Techniques!)
1/4 teaspoon freshly ground black pepper

For the Fries
5 Yukon gold potatoes, about 1 1/2 pounds total, each cut lengthwise into 1/2 inch slices
2 tablespoons extra-virgin olive oil
2 teaspoons minced fresh rosemary leaves
1/2 teaspoon Kosher salt
1 teaspoon freshly ground black pepper
2 tablespoons finely chopped fresh Italian parsley leaves

Directions:
For the Brine
In a medium bowl, whisk the brine ingredients until the salt and sugar dissolve, 2-3 minutes. Place the pork chops in a large, resealable plastic bag and pour in the brine. Press the air out of the bag and seal tightly. Turn the bag to distribute the brine, place in a bowl, and refrigerate for 1-1 1/2 hours.

For the Pork Chops
Remove the chops from the bag and discard the brine. Pat dry with paper towels (do not rinse) and season evenly on both sides with the rosemary and pepper. (If you did not brine your chops, sprinkle both sides with Kosher salt.) Let stand at room temperature for 15-30 minutes before grilling.

For the Glaze
In a small saucepan over medium-high heat, boil the balsamic vinegar until slightly thickened and reduced to 1/4 cup, about 10 minutes. Remove from the heat. Whisk in the butter and season with salt, pepper, and sugar. Transfer to a small bowl.

For the Sauce
In a small bowl, mix the sauce ingredients.

For the Fries
Cook the potato slices in a large pot of boiling salted water just until they are cooked halfway through and beginning to soften slightly, about 5 minutes. Drain. Rinse with cold water to cool quickly. Drain again. Drizzle the potato slices with oil and season evenly with rosemary, salt, and pepper.

Grilling the Chops and Potatoes
Prepare the grill for direct cooking over medium heat (350-450 degrees) and high heat (450-550 degrees). Brush the cooking grates clean. Grill the chops over direct high heat and the potato slices over direct medium heat, with the lid closed as much as possible, until the chops are still slightly pink in the center and the potatoes are tender and grill marks appear, turning once or twice. The chops will take about 10 minutes and the potatoes will take 6-8 minutes. Remove from the grill as they are done. Place the potatoes in a medium bowl and toss with the parsley. Season with more salt and pepper, if desired.

To Serve
Place one pork chop on each of four plates. Reheat the balsamic glaze. Divide the potatoes among the plates. Drizzle the chops with the balsamic glaze. Serve the sauce on the side as a dip for the potatoes.

Tuesday, August 12, 2014

Nutella turns 50!

Everyone loves Nutella! In fact, my youngest child just might starve without it! According to mentalfloss.com, one jar of Nutella is sold every 2.5 seconds, was 3rd most "liked" in 2009 on Facebook, and even has it's own day of celebration known as "World Nutella Day" on February 5! In addition, worldwide sales of Nutella exceeds those of all brands of peanut butter combined! Wow! But where did this dreamy concoction come from? We have to thank the Piedmont region of Italy, the country's chocolate-making capital and where the most delicious and abundant hazelnuts grow.

After World War II, there were shortages of cocoa, making chocolate so expensive that most Italians couldn't afford it. As a result, in 1946, Pietro Ferrero began selling his hazelnut/cocoa creation in block form, and called it "Pasta Gianduja." In 1951, Ferrero began selling a creamy version named "Supercrema." In 1964, Ferrero's son, Michele Ferrero, revised Supercrema, renamed it "Nutella," and began selling it across Europe, and eventually the world! Thank goodness he did! However, Ferrero was not the first to create the addictive mixture of cocoa and hazelnuts.

In the beginning of the 1800s, during the Napoleonic Wars, British ships blocked the import of cocoa beans from the Americas to the Mediterranean. As a result, a clever chocolatier named Michele Prochet created the original blend of cocoa powder, milk, vanilla, and hazelnuts. In 1865, Carrafel patented his concoction and named it "Gianduiotto." The chocolate debuted at the annual carnival in Turin, Italy, under the name of Gianduja (also spelled Gianduia), an ode to the masked character that is the official representative of the city! For more, see Romancing the Tin

So, with all this talk about Nutella, I want to share this recipe sent to me by my youngest (of course!) sans title, that I am going to call "Fudgy Nutella No Bake Cookies." This recipe is super simple and is devoured as fast as I can make them! My kids go nuts for them and I'm sure you will too! Grazie Nutella!


Fudgy Nutella No Bake Cookies

Makes approximately 3 dozen, depending on size.

Ingredients:

2 cups sugar
1/4 cup cocoa
1/2 cup milk
1/2 cup butter
1 teaspoon vanilla extract
Pinch of salt
1/4 cup peanut butter
1/4 cup Nutella
3 cups quick Oats

Directions:

Over medium heat, bring the sugar, cocoa, milk, and butter to a boil. Boil for one minute. Remove from the heat. Stir in the vanilla, salt, peanut butter, Nutella, and oats. Stir until combined. Using two spoons, drop heaping tablespoons on parchment or wax paper and allow to cool. Refrigerate. Eat. Repeat.
  

Monday, July 28, 2014

No Show at the Arc de Triomphe!

I guess the light show at the Arc de Triomphe was only for last year, which was the 100th Tour de France! Bummer... Well, In case you missed it, here you go! Thanks, Santiago Salcedo!


Thursday, July 24, 2014

A Turtle Shell + the Maillot Jaune = Podium Time

The Tour de France is completing their last mountain stage in the Pyrenees today, starting in the historic town of Pau, the birthplace of King Henri IV of France, who was born in the magnificent Pau Castle. The castle dates back to the 14th century and is now a museum featuring a valuable collection of tapestries, paintings, furniture, Sevres porcelain, and the turtle shell that was King Henri's cradle. Apparently, at that time, a turtle shell was believed to bring long life to bodies placed inside! Who knew?

Although it's almost certain that the Italians are taking home the maillot jaune (yellow jersey), there will no doubt be quite a show at the Arc de Triomphe in Paris on Sunday. I strongly advise that you check it out! In addition, why not try this super simple and amazingly delicious recipe for "Seared Steak with Red Onions, Spinach, and Roquefort." As long as you have a cast iron pan, this chic meal takes less than 30 minutes and will transport you to a Paris bistro, just in time for the festivities! Vive le Tour!


Seared Steak with Red Onions, Spinach, and Roquefort

Serves 4
*Serve with a crusty baguette and red wine.

Ingredients:
1 tablespoon, plus 1 teaspoon olive oil
2 strip steaks, 1 1/2" thick (Buy the best steak you can and have your butcher cut it for you.)
Kosher salt and freshly ground black pepper
1 red onion, sliced into rounds, rings separated
2, 8 ounce packages of baby spinach, thick stems discarded
1 tablespoon balsamic vinegar
3 1/2 ounces Roquefort cheese, broken into 4 pieces

Directions:
Preheat oven to 400 degrees. Heat 1 teaspoon of the oil in a large cast-iron skillet over medium-high heat. Season the steaks with salt and pepper and cook until browned on one side, approximately 3 minutes. Turn the steak.


Scatter the onion rings around the steaks, drizzle with the remaining 1 tablespoon of oil and cook for 3 minutes, turning the rings occasionally to make contact with the pan. 


Transfer the skillet to the oven and cook to desired doneness, 4-5 minutes for medium-rare. Transfer the steaks to a cutting board, cover loosely with foil, and let rest at least 5 minutes before slicing.


While the steaks rest, continue to saute the onions for another minute or so over medium-high heat. Add the spinach to the onions in the hot skillet. Season with 1/4 teaspoon salt and 1/4 teaspoon pepper and toss with the onions until the spinach is beginning to wilt, 1-2 minutes. Transfer the spinach and onions to 4 plates and drizzle with the vinegar. Slice the steaks and divide among the plates along with the Roquefort. 

Delicious!

Thursday, July 10, 2014

Get Along Little Dogies!

Old recipes are often forgotten. Left to stray in the open prairie like a "dogie," meaning a motherless calf. How sad... However, this recipe for "Texas Ranger Cookies" can never be forgotten! Texas Ranger Cookies are also called "Cowboy Cookies," "Ranger Cookies," "Kitchen Sink Cookies," and even "Governor's Mansion Cowboy Cookies," from Laura Bush's recipe that was featured in Family Circle. No one is sure where this recipe originated, but is generally thought of as an easily portable food source, nourishing enough for those cowboys on the plains, like a precursor to the granola bar.

I have to admit, growing up in Texas, I had never heard of or had the great pleasure of eating these fabulous cookies. Thankfully, on a visit to my awesome mother-in-law's in Virginia, she had graciously made these. Loaded with oatmeal, chocolate chips, coconut, nuts, and cornflakes, I was instantly addicted! Although recipes vary, adding raisins, omitting the cornflakes, etc., I think they are perfect exactly as they are! Yeehaw!


Texas Ranger Cookies

Makes approximately 4 dozen.

Ingredients:
1 cup unsalted butter, at room temperature
1 cup white sugar
1 cup brown sugar
2 eggs
1 teaspoon vanilla extract
2 cups all-purpose flour
2 teaspoons baking soda
1 teaspoon baking powder
1/2 teaspoon salt
2 cups oatmeal
1 cup sweetened coconut flakes
1 cup chocolate chips
1 cup chopped nuts (I use pecans.)
2 cups cornflakes cereal

Directions:
Preheat oven to 375 degrees. 

Cream together the butter and sugar in a stand mixer. Add the eggs and vanilla and blend to mix. In a separate bowl, blend together the flour, baking soda, baking powder, and salt. Gradually add the flour mixture to the creamed butter mixture. Blend in the oatmeal, coconut, chocolate chips, and nuts. Remove the bowl from the mixer and stir in the cornflakes.


Using two spoons, drop approximately 1 heaped tablespoon of dough onto a baking sheet, approximately 8 cookies per pan. Bake for 8-10 minutes. (8 minutes will give you a chewier cookie, while 10 will make it more crisp.) Remove to a wire rack to cool. Store in an airtight container.


Thursday, July 3, 2014

Chocolate and the Yellow Jersey!

While the entire US is gearing up for 4th of July celebrations, I'm looking forward to the 101st Le Tour de France, which begins Saturday, July 5 through Sunday, July 27! The peleton (which refers to the entire group of cyclists, each wearing their team jerseys) will have to battle it out over 21 stages: 9 flat, 5 hill, 6 mountain (that will have 5 altitude finishes - my favorite!), and  1 time-trial. The Tour is a grueling affair, with wrecks (where some will suffer injuries, usually referred to as "road rash"), packs of humorously dressed fans (who are not restricted from getting as close to the riders as they want), and only 2 days of rest! Phew!

At the end of each stage, jerseys are awarded to the overall leader (the yellow jersey), the best sprinter (the green jersey), the best climber (the polka dot jersey), and the best young rider under 25 (the white jersey). The beauty of the Tour is that the standings can change day by day, up to the grand finale where the final jerseys (and prize money) are awarded! An amazing celebration and light show at the Arc de Triomphe wraps it all up! While I am not a true cycling enthusiast, I love to watch the tour to see all the beautiful locations that I have yet to visit! France is a beautiful country!

So, in honor of the Tour, I would like to share this recipe for "Tarte au Chocolat" from Reims, France (one of the Tour stages!), published in Bon Appetit, May 1994. This recipe is fabulous because it makes just enough pastry to create a beautifully thin crust, and the filling is rich and decadent! Please note that I've altered the original recipe by adding a chocolate glaze to give it a glossy top! After all, no one minds extra chocolate!

(They're racing to my tart! Ha! Ha!)

Tarte au Chocolat (Chocolate Tart)

Serves 8
*You will need a 9" tart pan with removable bottom.

Ingredients:
For the Pastry
1 cup all-purpose flour
1/4 cup powdered sugar
6 tablespoons unsalted butter, chilled and cut into small pieces
2-3 tablespoons heavy cream

For the Chocolate Filling
1/2 cup heavy cream
1/4 cup whole milk
10 ounces semisweet chocolate, chopped
1 egg

For the Glaze
3 ounces bittersweet chocolate, chopped
1/4 cup heavy cream

Directions:
For the Pastry
Blend the flour and sugar in a food processor. Add the butter and pulse until the mixture looks like coarse meal. Add the cream and process until moist clumps form. Turn the dough out onto a piece of plastic wrap. Using the plastic wrap, gather the dough into a ball, flatten into a disk. Wrap in the plastic and chill in the refrigerator for 30 minutes.

Preheat the oven to 350 degrees. Roll the dough out on lightly floured surface (or between two sheets of plastic wrap) to form an 11" round. Remove one sheet of plastic wrap (if using). Using the remaining piece of dough/plastic wrap, place the dough (plastic side up) into a 9" diameter tart pan. Press gently into place. Remove the plastic wrap and fold over the edges to form a double thickness on the sides. Poke the bottom of the pastry with the tines of a fork. Cover and refrigerate for at least 30 minutes.


After 30 minutes, line the crust with aluminum foil, shiny side down. Fill with dried beans or pie weights. (I keep a large jar of beans, which I reuse over and over.)


Bake 20 minutes. Carefully loosen the foil from the edges of the tart crust, then gently lift out the foil and beans. Continue to bake the crust until golden brown, approximately 10 minutes. Transfer to a cooling rack. Maintain oven temperature.

For the Chocolate Filling
Bring the heavy cream and milk to a simmer in a medium saucepan. Reduce heat to low, add chocolate and stir until melted and smooth. Beat egg in a medium bowl. Gradually whisk 1/4 cup of the chocolate mixture into the egg. Whisk in the remaining chocolate mixture into the egg mixture. Pour the filling into the tart crust and bake until set, approximately 15 minutes. Transfer to a cooling rack to cool.


For the Glaze
Place the chocolate in a small bowl. Bring the cream to a boil, then pour over the chocolate. Stir to melt. Pour over the tart so it coats the top evenly, tipping if necessary, using a spatula to smooth it out. Let set at room temperature for at least an hour to firm before serving.


**See also Savory Swiss Chard Tart and Creme Patissiere for more recipes that honor the Tour!

Wednesday, June 25, 2014

Life is Just a Bowl of Cherries

Cherries are back! Which, always makes me think of the song, "Life is Just a Bowl of Cherries," written by DeSylva & Brown in 1931. The lyrics go like this:

"Life is just a bowl of cherries.
Don't be so serious;
Life's too mysterious.
You work, you save, you worry so,
But you can't take your dough when you go, go, go.
So keep repeating it's the berries,
The strongest oak must fall,
The sweet things in life,
To you were just loaned,
So how can you lose what you've never owned?
Life is just a bowl of cherries,
So live and laugh at it all."

Maybe we should all spend more time not taking life so serious, and doing things like this:


In addition, with cherries at their peak, why not make the classic French dessert, "Cherry Clafoutis," named from the lingering regional dialect of Provence, Northern Spain, and Northern Italy, known as "Occitan." It's the same as the natural beauty line of products by "L'Occitane en Provence," meaning "the woman from Occitania." Also note, that a "clafoutis" (kla-foo-tee) is only made with cherries. If other kinds of fruit are used, the dish is properly called a "flaugnarde."

This enhanced recipe from Martha Stewart Living caught my eye, because of the addition of kirsh (cherry brandy) and the seeds of a vanilla bean (as opposed to vanilla extract). The recipe turned out perfectly; although, my family thought it should be a little sweeter. So, maybe next time I'll add another 1/4 cup of sugar. In addition to a dusting of powdered sugar, a scoop of vanilla ice cream, or a dollop of creme fraiche or whipped cream, makes a nice addition.


Cherry Clafoutis

Serves 8

Ingredients:
1 tablespoon unsalted butter, softened
1 1/2 pounds cherries, stemmed and pitted
3 tablespoons all-purpose flour
Pinch of salt
1/4 cup granulated sugar
4 large eggs
2 large egg yolks
1 cup milk
1 cup heavy cream
1 vanilla bean, split and scraped
3 tablespoons kirsch
Confectioners' sugar, for dusting

Directions:
Preheat the oven to 375 degrees. Butter a 10" porcelain tart dish (I used a 11" deep dish pie pan), and fill with cherries. Set aside.


Sift flour and salt together into a large bowl. Add sugar. Gradually whisk in whole eggs, egg yolks, milk, and cream. Add vanilla-bean scrapings and kirsch; whisk to combine.


Using a sieve, strain the batter over the cherries.


Bake until puffed and browned, about 45 minutes.


Let cool until warm; it will sink slightly. Dust with confectioners' sugar, and serve!

Thursday, June 12, 2014

Feeling Ugly? Eat This!

We all know that we should incorporate more fruit in our diets. Not only is it good for your overall health, it's also good for your skin! Fruit contains high water content, which is good for hydration, and is loaded with vitamins and minerals needed to make you feel healthy and energized. And because fruit contains high levels of vitamin C, it will help boost collagen production, repair tissue damage, and protect your skin against free radicals! Now that's super food!

Honey has been used to enhance beauty since the dawn of time. Although the beauty benefits of honey are usually topical, incorporated into face masks, hair masks, and baths, etc., ingesting it will help you from the inside out. After all, you are what you eat! Right? The ancient Romans gave honey to their Olympic athletes to boost performance and endurance. Honey also has antioxidant and anti-bacterial properties, which helps boost your immune system and prevent disease. In addition, honey is good for hangovers, sore throats, and a teaspoon before bed helps you sleep! No wonder Aristotle called it the nectar of the gods!

Now that we understand that fruit and honey is good for the skin, so is mint! Mint is a popular herb used in shampoos, lip balms, and mouth rinses. But it is also found in many beauty products to sooth itching and infections, look for "menthe" on the labels. Mint has a high salicylic acid content, which is good for loosening dead skin cells, resulting in clearer skin. Mint can also help with digestion problems, such as bloating, and is also good for headaches, nausea, colds, and even the flu!

Want to feel better and look better, too? Try this "Fruit Salad with Honey, Lime and Mint!" This is the perfect refreshing summer salad! In fact, it's the only way I can get my fruit-phobic husband to eat his fruit! I recently served this along side chiles rellenos, instead of the typical beans and rice. It was delicious and kept the meal from being heavy or unctuous. Feel free to use any fruit you prefer or have on hand, e.g., berries, kiwi, honeydew, etc. Add this simple recipe to your repertoire and you will have no problem eating your way to healthier skin!


Fruit Salad with Honey, Lime, and Mint

Serves 4-6

Ingredients:
5-6 cups fruit, cut into bite-size pieces (I use 1 whole cantaloupe and 1 pint strawberries)
3 tablespoons honey
3 tablespoons fresh lime juice
1 teaspoon lime zest
3 tablespoons finely chopped fresh mint leaves

Directions:
Place all the fruit in a large bowl. Cover and refrigerate until just before serving.

In a small bowl, mix the honey, lime juice, lime zest, and chopped mint together. Just before serving, pour the dressing over the fruit and gently toss to combine.

Recipe slightly adapted from Ellie Krieger.

Wednesday, June 4, 2014

Grandma's Rhubarb Pie!

Rhubarb is one of the first fresh garden products of the season in cold climates. The stalks of these perennials are most often used in pies, which is why rhubarb is sometimes referred to as "pie plant." Although rhubarb is considered a vegetable, in 1947, a New York court decided that because rhubarb was used as a fruit in the United States, it was to be considered fruit, thus reducing tariffs on imported rhubarb. If you've never cooked with rhubarb before, I have a fabulous old-fashion recipe for you!

I feel it's important to preserve recipes from the past. Those personal recipes of honest home cooking are our history, it's what makes us American, it's what makes us family. This recipe for Strawberry Rhubarb Pie is from the wonderful Ruth Zylich of Barton, New York. This slightly sweet and slightly tart pie is a favorite of my husband and all of his family. Sometimes it's nice to take a deep breath and revisit the classics from our past.


Ruth's Strawberry Rhubarb Pie

Ingredients:
2 cups cubed rhubarb
1 cup cubed strawberries
2 eggs
2 heaping tablespoons flour
1 cup granulated sugar
1/8 teaspoon salt
Cinnamon, sugar, and 1 tablespoon butter, to finish the top crust
1 double-crust 9" pie dough (recipe below)

Directions:
Preheat oven to 400 degrees. Place the rhubarb and strawberries in a 9" unbaked pie shell.


Mix the eggs, flour, sugar, and salt together and pour over the top of the rhubarb and strawberries.


Place the second pie crust over the top, trim and crimp the edges to seal. Sprinkle the top with cinnamon and sugar. Cut 4 slits on the top and dot with the butter.


Bake for 10 minutes. Reduce the oven to 350 degrees and continue to cook for 45 minutes, or until the rhubarb is done.


Double-Crust 9" Pie Dough

Recipe from America's Test Kitchen

Ingredients:
2 1/2 cups unbleached all-purpose flour, plus more for dusting work surface
1 teaspoon salt
2 tablespoons sugar
1/2 cup vegetable shortening, chilled
12 tablespoons (3/4 cup) cold unsalted butter, cut into 1/4" pieces
6-8 tablespoons ice water

Directions:
Process the flour, salt, and sugar in food processor until combined. Add the shortening and process until the mixture has the texture of coarse sand, about 10 seconds. Scatter the butter pieces over the flour mixture; cut the butter into the flour until the mixture is pale yellow and resembles coarse crumbs, with butter bits no larger than small peas, about ten 1-second pulses. Turn the mixture into a medium bowl.

Sprinkle 6 tablespoons of the ice water over the mixture. With a rubber spatula, use a folding motion to mix. Press down on the dough with the broad side of the spatula until the dough sticks together, adding up to 2 tablespoons more ice water if the dough will not come together. Divide the dough into 2 balls and flatten each into a 4" disk. Wrap each in plastic and refrigerate at least 1 hour or up to 2 days before rolling.